The summer of 2016 was very productive! I wanted to learn about Japanese Kogin embroidery and I also wanted to build a clasp purse. I managed both in one project.
Our local guild (CGNFA) had a challenge that summer – to learn a type of embroidery that you had not tried before. It was great challenge and I learned a great deal. During my search on Kogin, I found an absolutely spectacular blog site called Caro-Rose Creations which is hosted by Carolyn Foley. Carolyn has catalogued a huge number of Hishizashi (diamond motif) patterns – I think nearly 700 at this point.
Kogin was originally intended to reinforce clothing to endure cold winter, but evolved into a rural domestic craft in the farming communities during the Edo period (1603-1868). At that time farmers were only permitted to make clothing out of hemp material. Cotton thread was used to sew and reinforce the clothing.
The difference between Kogin and Hishizashi patterns is that hishizashi patterns are made using an EVEN number of stitches on the weft. Kogin (from the northwest part of Mainland Japan) patterns are made from an ODD number of stitches. Hishizashi means “diamond” and it is a traditional pattern which is from the Nanbu region which is in the northeast part of Mainland Japan.
Check out Carolyn’s library here: http://carorose.typepad.com/my_weblog/kogin-embroidery-patterns/
Finding these Hishizashi patterns was just the perfect thing. I went through ALL 700 of them and picked a few favourites! Originally I was intending to choose 2 or 3 patterns and then switch between them to create an interesting design. WELL, after starting on just the first one, I soon realized the complexity of the design and revised my pattern selection to just ONE! and here is my very first diamond!

As this was a first attempt at this kind of embroidery, I wanted to keep things as simple and as inexpensive as possible. I used DMC pearl cotton #8 in white, and purchased a small piece of navy evenweave fabric.
Here’s a picture after I finished a few more diamonds: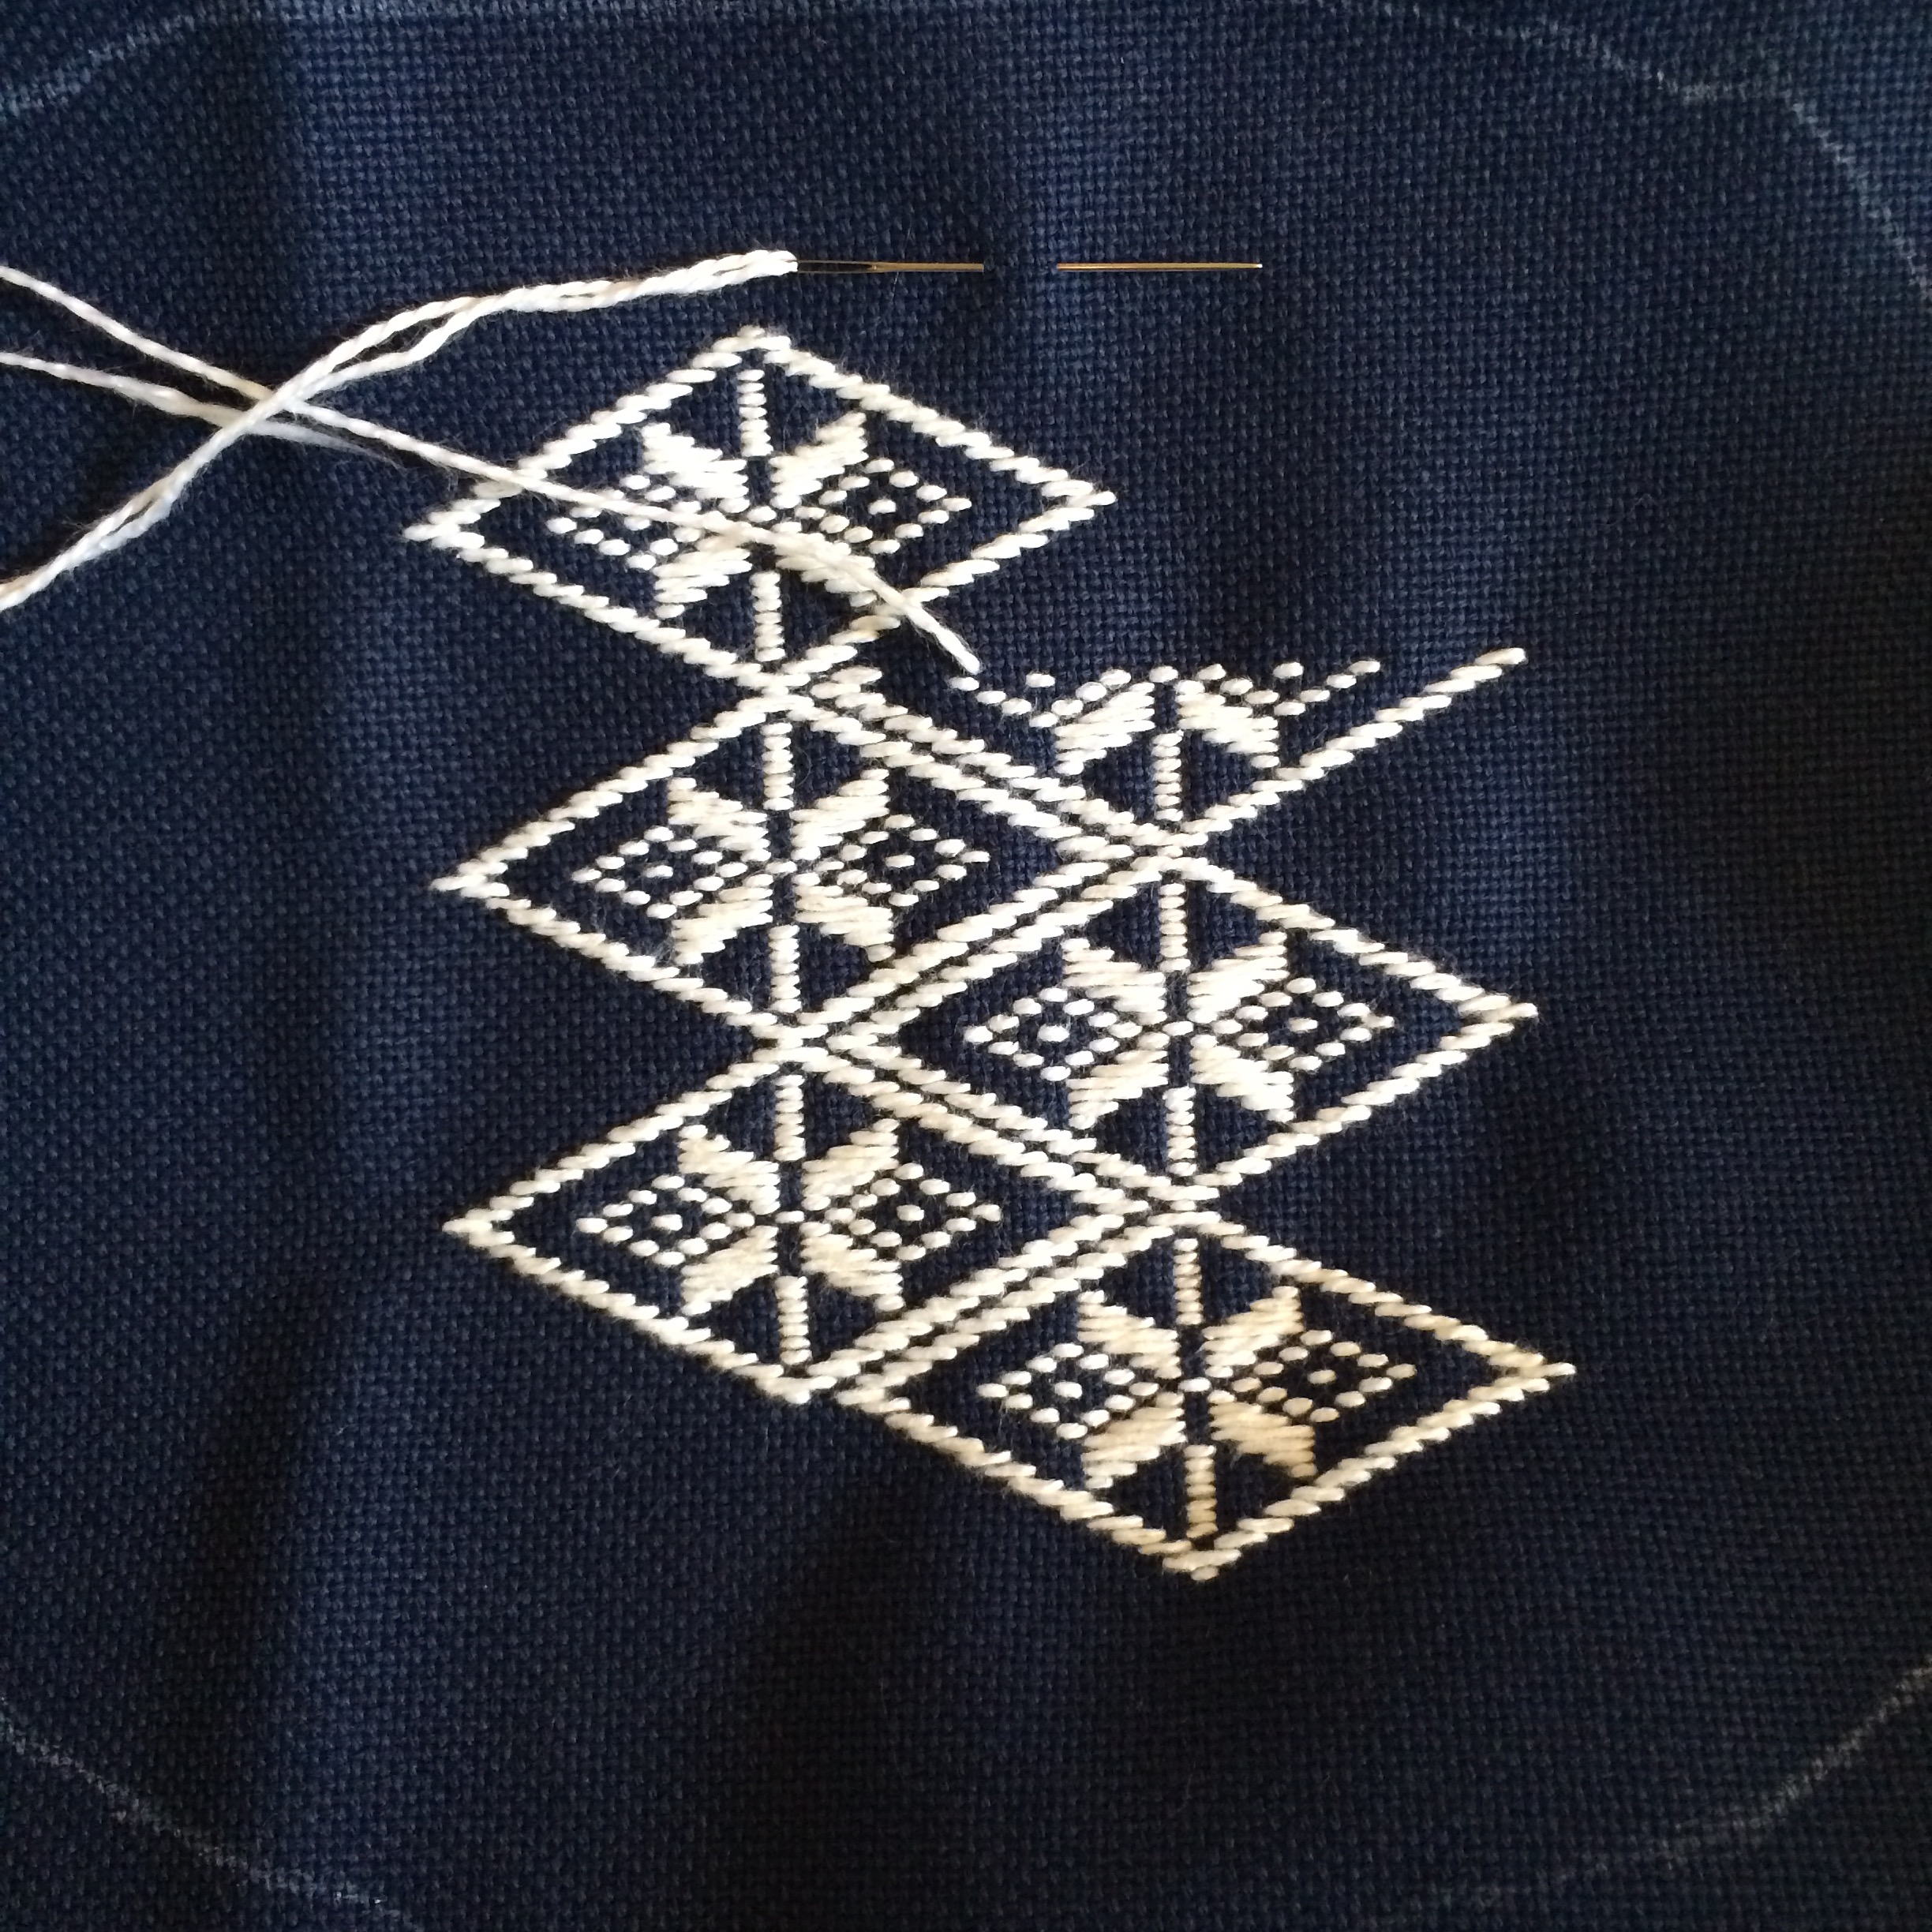
This is a really good picture as you can see my stitching progression AND also the line of the pattern for the clasp purse. This is where things started getting interesting! Compensating stitches in a kogin pattern is not an easy thing to do!! Here’s another progress shot – almost there! See the compensating stitches near the pattern line?

And finally, after quite a struggle (a lot of ripping out and re-stitching and some swearing) I finished the panel. I decided at this point NOT to stitch the full panel for the other side of my clasp purse. I went with a much simpler plan – I did one – yes, just one – diamond on the back panel.

Voila! finished the front panel!
Now for the clasp purse assembly. I’ve never made a clasp purse, so I thought I’d make tester. What fun! My little tester purse turned out just beautifully! I found some lovely owl fabric and some sweet red mochi dot fabric for the lining. A little soft and stable, and zip, zip, zip on my sewing machine – DONE!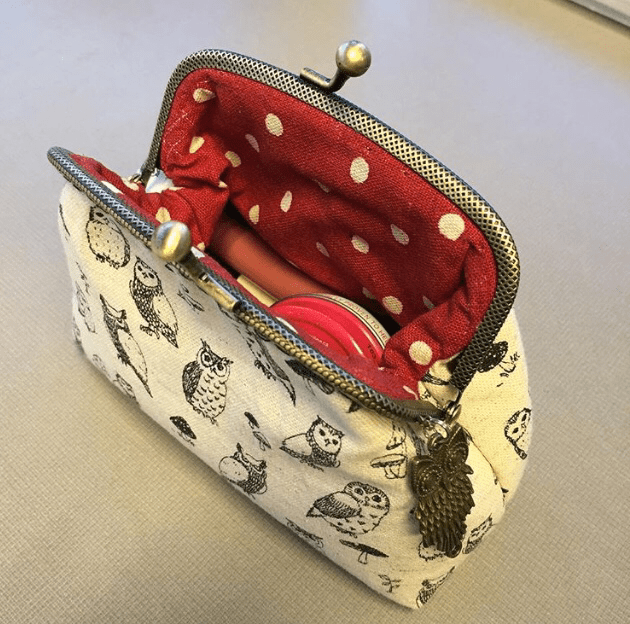
I was really excited now – my test purse turned out so beautifully – my little Kogin purse was going to be just awesome! I did have trepidation – I would have to cut it out! YIKES. some of my compensating stitches had passed over the pattern line and I was very worried about my stitching coming undone.
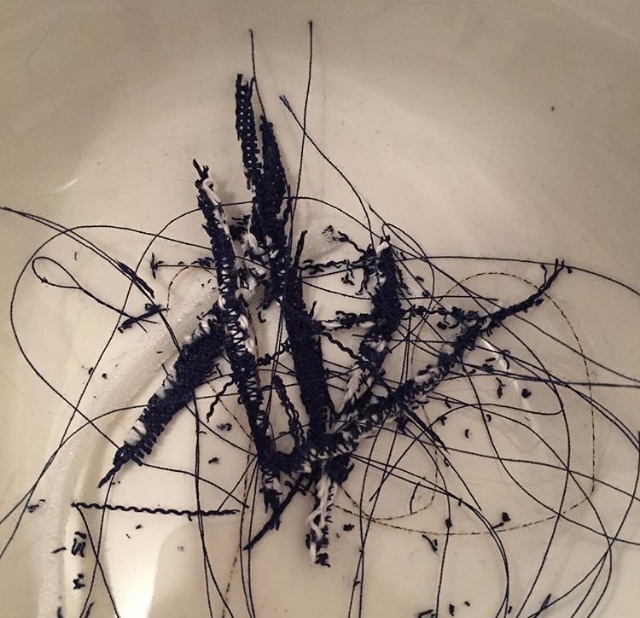
And then I thought of a solution – I decided to zig zag over the edges, catching the stitches and holding them down. If I had to cut through, the stitches would stay in place. I needed to keep the zig zag fairly narrow as well so that it would be hidden in the 1/4″ finishing seam.
And so I zig zagged and then I cut!
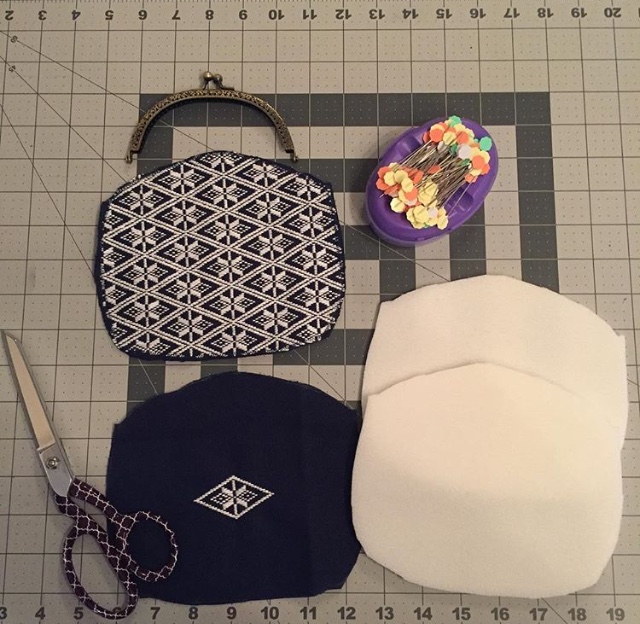
The front and back panel (and soft and stable lining), cut out and ready to be put together. (see my simple one diamond back panel – it’s perfect!)
Here are the scraps from when I cut around the pattern line… I think I did pretty good with my compensating stitches! HAH!!
With all of that excitement over, I continued to assemble my clasp purse. Here is the lining, and the two panels are now together with the soft and stable lining.

And now everything is together. My little purse is looking just so lovely! I decided on a rounded clasp for this little purse – the right choice I think!

The clasp is sewn on with some very strong and durable upholstery thread. Hershey my trusty assistant helped hold the threads for me.

And finally after a while stitching, the clasp was sturdily sewn on. I added a cute little paper crane ornament and my kogin clasp purse is complete!
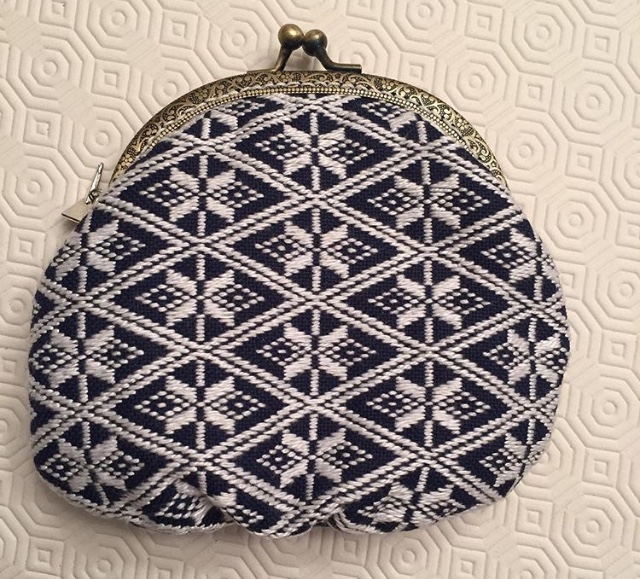
From inception to completion, this project took me around 2 months. I am still using this lovely purse on a daily basis. Here’s a link to a video I took right after completion.
Here is my purse today. It holds my lip gloss and other small things. Still just like new (but I think I might need to give it a wash :0)


