This post is from October 2020… I’ve started a YouTube video series which follows along with the construction of my embroidery journals. There’s lots of planning and gathering of materials and I thought the videos would be a good idea to document some of the planning. Here are links to my first 2 videos.
Finding inspiration in your stash (and boy did I find a lot!)
Planning my journals
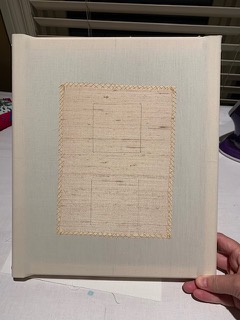
I’ve made some decisions for my journals… and I feel pretty good about them! As I mentioned in the first video, I am planning at least 3 journals. But where to start? Making a decision is the hardest thing to do. So, I have decided to start with a single page. I am enrolled in Sew by Hand’s (Natalie Dupuis) “Humbly Magnificent Couching Stitch” and I will be using the stitch samples as pages in my goldwork book. This is a perfect solution for me as I can manage the coursework and building the journal pages at the same time. The gold work class has also helped me decide what the page size and layout will be and has made it very easy for me to get started. I am keeping the page size consistent with the journal template I created (my silk fabric is 6” x 8” and will be trimmed to size later). Here’s my first page all framed and ready to be stitched!
Journal Page Size – a helpful file!
I’ve made some art! well, only sort of art! I’ve drawn the layout for the pages for the “getting it out of my system journal” The pages will be approximately 5 1/2″ x 6″ finished. Fabric size will be 8 1/2″ x 11″ .
Pondering thoughts…Do have projects you are currently working on (or classes you are taking) that could become part of a journal? Don’t think too big – start with just one page, just one idea. Decide on page size.If you are going to work on Trish’s journal project – start looking at your fabric – do you have a favourite fabric you like to stitch on? Do you have threads in your stash that have no particular purpose or project (you bought because you loved??) It’s time to bring them out into the light!
Some inspiration…
Temperature Stitch – assign different colours to a temperature ranges (you can do daily high or daily high/low). Some are done as a yearly stitch along – but you could do just one month – I like the flower garden version in this pattern (below), but you could do a tree/mandala, whatever you decide!
https://www.etsy.com/listing/494788728/temperature-garden-cross-stitch-patternhttp://creativeworkshopsfromhetti.blogspot.com/2017/12/happy-new-year-2018-surprise.html
A Stitch a Day – there are many of these that are done as a yearly stitch along (SAL). You could do one for a month (or as long as you would like). Draw a shape and fill it in, go totally random and stitch anywhere on the page, draw an english garden design and fill it in. Make a stitch sampler – label stitches as you go. there are so many options!!!
https://www.creativebug.com/classseries/single/daily-embroidery-challenge-stitch-a-day-sampler
Drop Cloth Samplers – another cool idea that could easily work with both the stitch a day and temperature stitch concepts.
https://www.dropclothsamplers.com
Happy Stitching!

