My future son-in-law is a huge Pokemon fan! Last year I made this throw quilt for him for Christmas. It turned out so well, I thought I’d write up the instructions and share them so you can make a Charmander evolution quilt too!
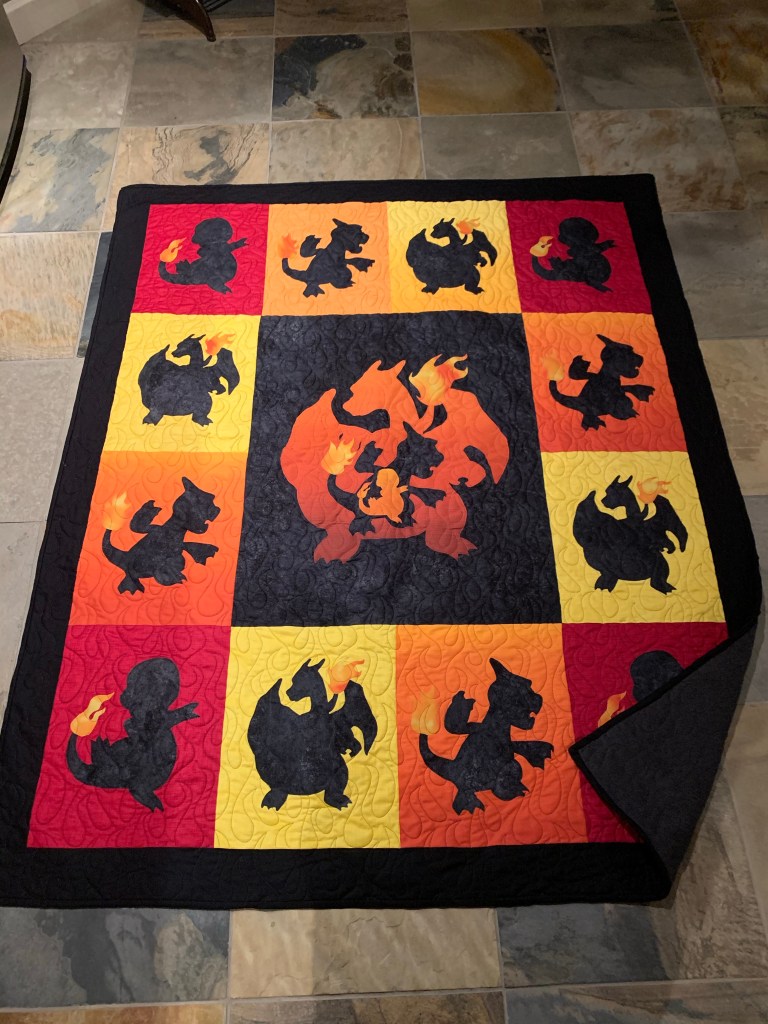
Quilt Finished Size – 54″ wide by 62″ high
Block Measurements
center block – cut 1 24 1/2″ w by 28 1/2″ h (finished 24″ by 28″)
surrounding blocks – cut 12 – 12 1/2″ w by 14 1/2″ h (finished 12″ by 14″)
sashing is 3 1/2″ wide x WOF (finished 3″)
binding – 2 1/2″ wide x WOF
Fabrics Suggested fabrics – choose low volume/blender prints – red, orange, yellow and dark grey/black for centre and sashing. I used the following fabrics:
For the surrounding blocks – Dublin by Deborah Edwards for Northcott Designs – Orange Peel, Moulin Rouge, Sunshine
For the center Charmander Evolution image – Fresh Hues Ombre by Robert Kaufman – Sunrise
https://www.fabric.com/buy/0619216/kaufman-fresh-hues-ombre-texture-gradation-sunrise
For all of the Charmander/Charmeleon/Charizard surrounding block images, and middle background fabric – Stonehenge Gradiations Basics Blenders by Linda Ludovico for Northcott Designs – Onyx Sienna Marble Dark
For the flame tails – Dan Morris for QT Fabrics, Easy Rider Flames – orange
https://www.fabric.com/buy/0660359/qt-fabrics-easy-rider-flames-orange
For the Sashing and binding – Kona Cotton – Black
For the backing – Fireside by Trendtex for Moda – Black
https://www.trendtexfabrics.com/fireside/fireside-9002-15
Notes:
use a 1/4″ seam allowance on all seams
press seams flat to one side
Additional Materials:
Heat and bond lite – double sided fusable interfacing
matching quilting thread (I used black to top stitch the pokemon images and orange to top stitch the tails)
Image Files – are at the bottom of this post!
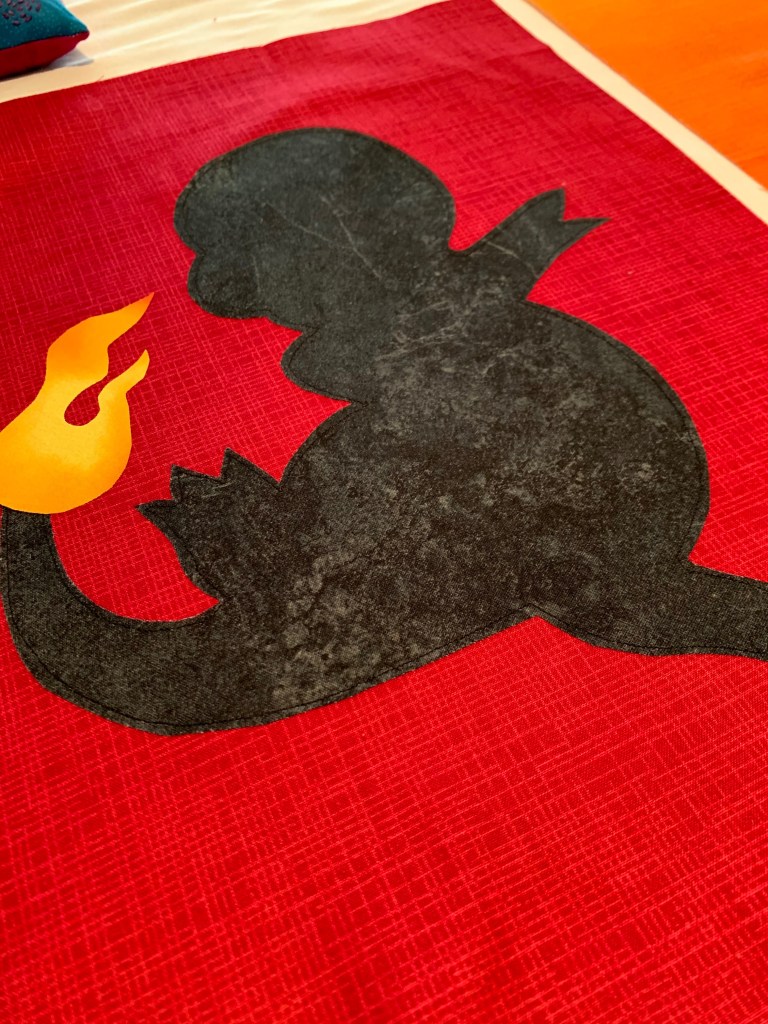
Preparing the framing blocks (12 blocks) 4 Charmander, (red) 4 Charmeleon (orange) and 4 Charizard (yellow)
Cut out 12 surrounding blocks – 4 red, 4 orange, 4 yellow
Trace each pokemon template onto the paper side of the double sided interfacing. You will need 4 of each image (total 12 images). Trace out the tails separately from the body.
Cut out each image from the paper interfacing leaving approximately 1/8″ to 1/4″ allowance around each shape.
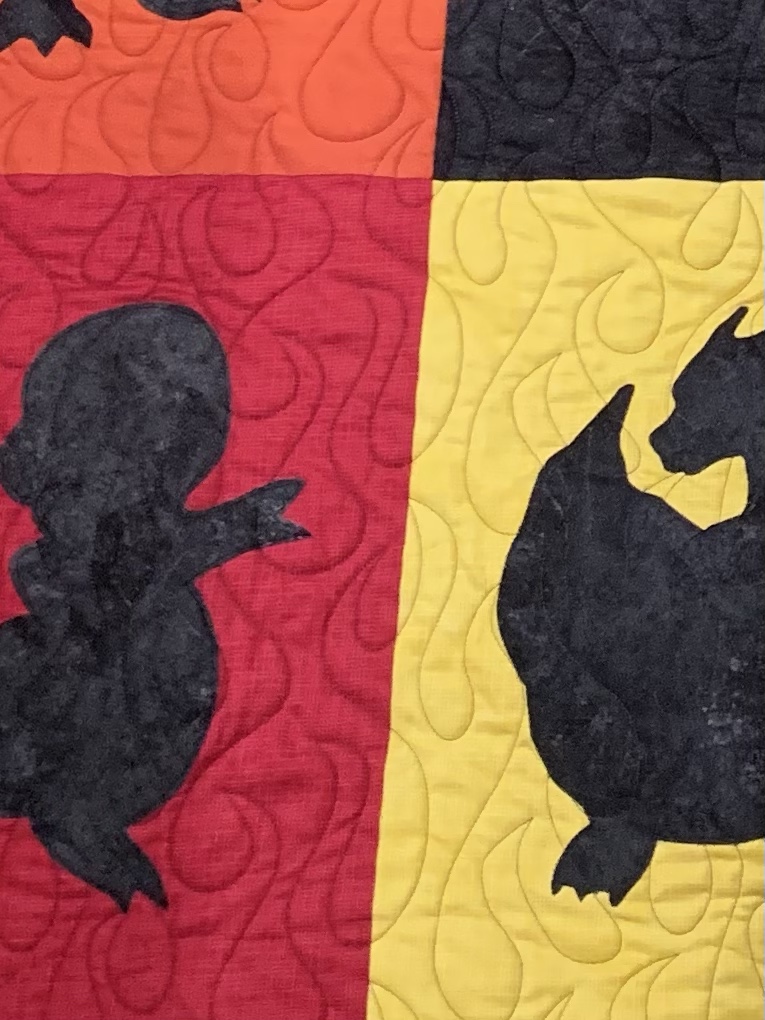
Iron the body images onto the stonehenge quilting fabric (onto the wrong side of the fabric). Iron the tails onto “fire” fabric. Using a sharp pair of scissors, trim each image on the line. Take your time and cut as accurately as possible.
Once you have finished trimming the image, remove the paper backing and position onto the background fabric (red/orange/yellow). Fuse onto the fabric using a hot iron (please follow the manufacturer’s instructions on fusing.)
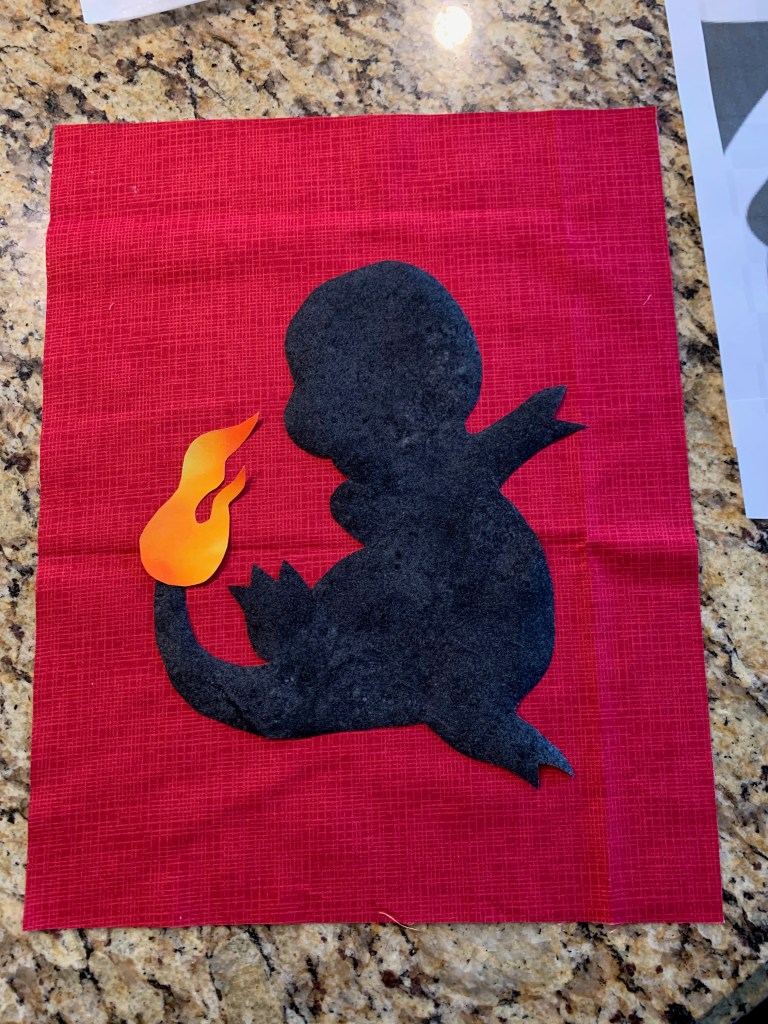
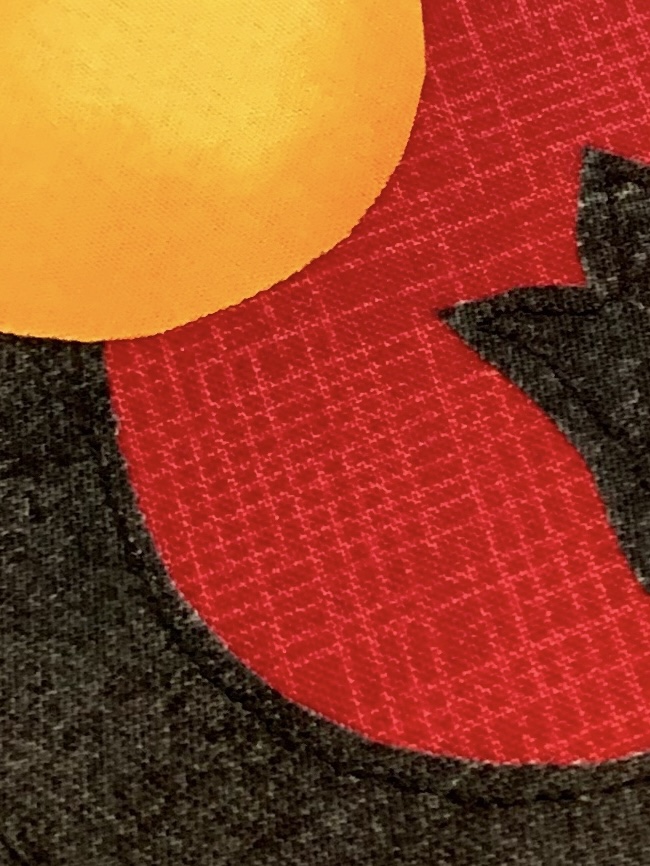
Top stitch: Reduce your stitch length to 1.5. Using a scant 1/8″ seam allowance, slowly sew around image very close to the edge. Go all the way around the image, keep as close to the edge as possible. Adjust your presser foot slightly every few stitches to follow the curved edges as closely as possible. This is a slow process. Take your time and be as accurate as possible. TIP: Use a matching colour of thread to hide the stitch line.
Once you have finished sewing around the image, place and fuse the fire tail (the bottom of the tail should overlap the top of the tail on the body image). Repeat the same sewing process to the tail tip as you did with the body.
Preparing the center block
Cut one block – 24 1/2″ by 28 1/2″ from the grey stonehenge fabric
Using the same procedure as you did for the 12 small blocks, trace out the largest charizard image onto the paper side of the double sided fusable interfacing. Trace the outside line, as well as the inside smaller charmeleon outline. NOTE: the image will be wider than the heat’n’bond page – you can tape 2 sheets together to complete the image
Trace out the small charmander on a separate piece of interfacing.
Trace out the 3 tail tips onto a separate piece of interfacing.
Cut out the images, leaving approximately 1/8″ to 1/4″ allowance. NOTE: on the large charizard image, you will be cutting out the charmeleon image as well. Be careful around the head/wing area!
Iron the largest charizard image onto the wrong side of the orange ombre fabric (towards the darker side). If you used 2 sheets of paper, iron one side first and then carefully place the other side so that the image lines up. Trim on the lines – cut out the inside charmeleon image.
Iron the small charmander (on the wrong side) onto another piece of ombre fabric (towards the lighter side) and trim on the line.
Press out the stonehenge backing fabric. Place the large charizard image so that it is centered on the fabric. Once you have the position how you like it – iron in place. Position the small charmander image inside the cut out of the charmeleon image (make sure the edges are not touching the larger charizard image). Iron in place. TIP: before you iron, confirm that the tail tip will not be touching any of the charizard image. Do not iron on the tail tips at this time.

Top stitch: Reduce your stitch length to 1.5. Using a scant 1/8″ seam allowance, slowly sew a straight line very close to the edge of the image. Go all the way around the outside of the charizard image, keep as close to the edge as possible. Adjust your presser foot slightly every couple of stitches to follow the curved edges as closely as possible. This is a slow process. Take your time and be as accurate as possible.
When you are finished sewing around the outside of the image, sew around the inside of the smaller charmeleon image. Repeat around the smallest charmander image.
Once you are finished sewing around the 3 images, place and iron on the 3 fire tail tips. Top stitch around the tails using the same process.
Layout and sewing the blocks together
Note: I cut out all of the images and did a complete layout before I fused any of the images to the fabric.
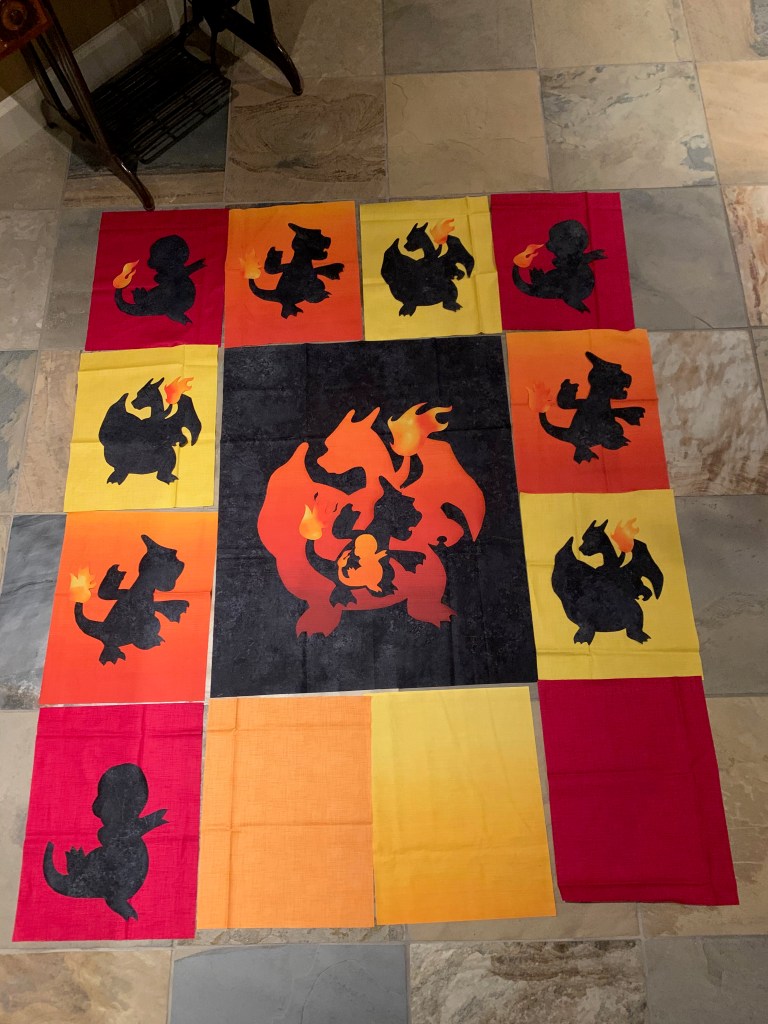
Layout your images so that the charmanders are in the corners. Then place the charmeleon and then the charizard (start in the top left corner and work around the center piece).
Sew the 4 top blocks together. Sew the 4 bottom blocks together.
Sew the 2 blocks together on each side of the center piece. Then sew them to the centerpiece sides. Finish by sewing the top and bottom rows of blocks onto the larger center piece. Make sure your corners match up.
Attach the sashing
cut out your sashing from the kona black cotton – 3 1/2″ x WOF (finished width is 3″)

attach the sashing to the sides first
then add the top and bottom pieces
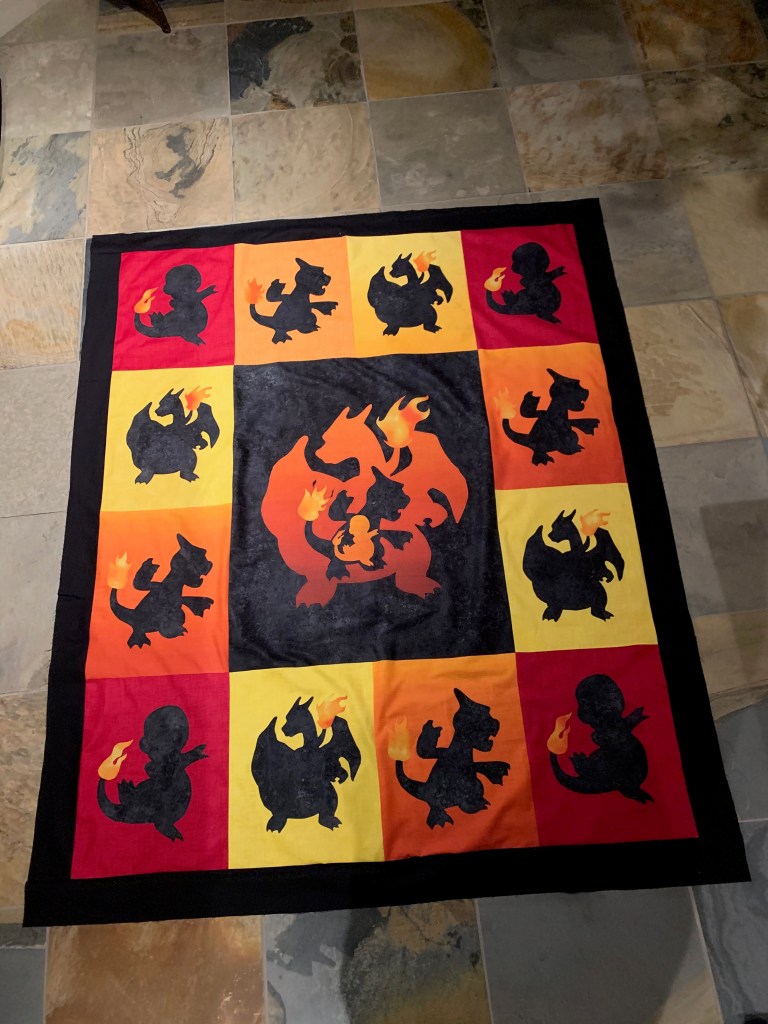
Finishing
This quilt was free motioned with “blaze” pantograph design (edge to edge).
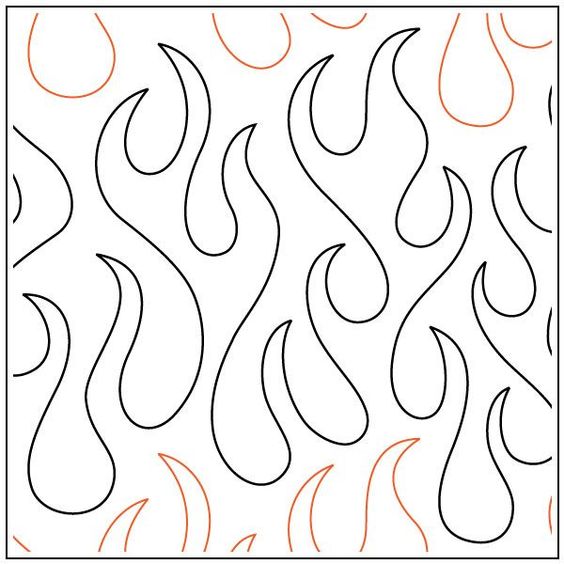
https://www.sewthankful.com/Kristins-Blaze-quilting-pantograph-sewing-pattern-Kristin-Hoftyzer.html

Fireside on the back, sandwiched with a layer of 100% cotton quilt batting (for extra coziness). The binding is black kona.
IMAGE FILES
NOTE: APPROXIMATE SIZES ARE WRITTEN DIRECTLY ON EACH IMAGE – ADJUST THE SIZE ACCORDINGLY WHEN YOU PRINT TO PAPER. THE CENTER IMAGE WILL PRINT TO MULTIPLE PAGES (WHICH WILL NEED TO BE ASSEMBLED)


I love the pokemon silhouettes and will soon prepare some table toppers for the grandkids. Actually they can’t talk about different things but pokemons…..
LikeLiked by 1 person
Thank you so much for sharing how you made this quilt. I’ve never made a quilt before but I think I’ll make this for Christmas for my husband ( I know it’s early) but I don’t wanna rush making the quilt!
LikeLike