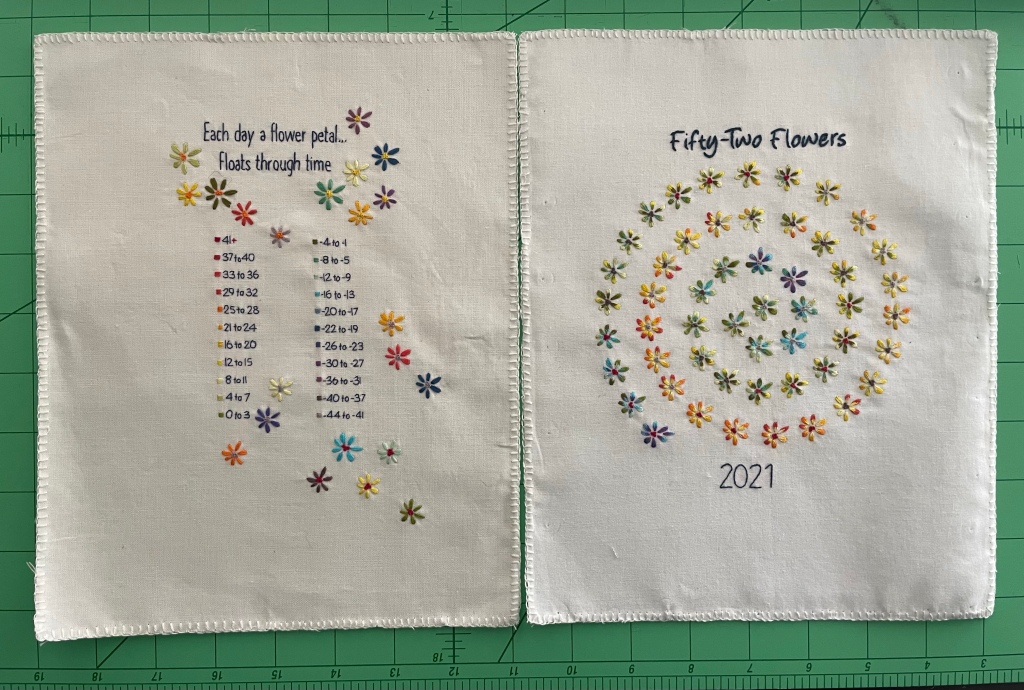
The book is coming together – the first two pages are ready to be put together. One of my many projects from 2022, this temperature stitch was destined to become part of my first journal. More on the temperature stitch can be found by following this link …
https://finishingisfun.ca/2022/01/25/fifty-two-flowers-temperature-stitch-look-back-at-2021/
Front cover…
What should I put on the front of this book? I am NOT SURE! An agonizing decision.
What should the title be? again – NOT SURE!!
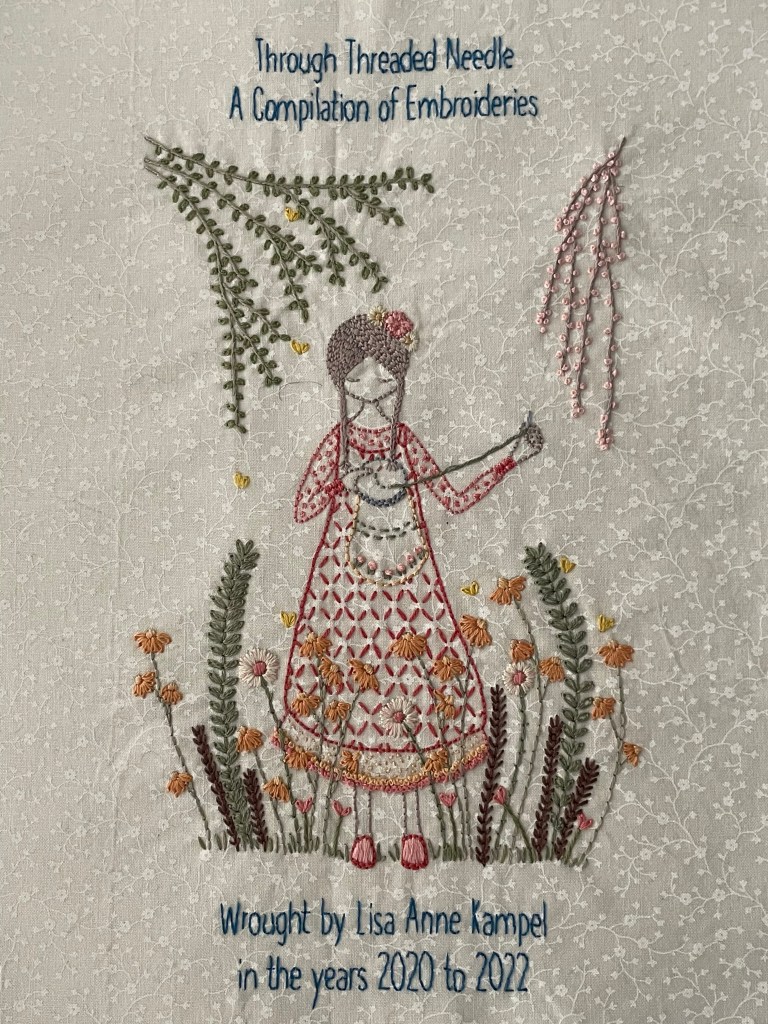
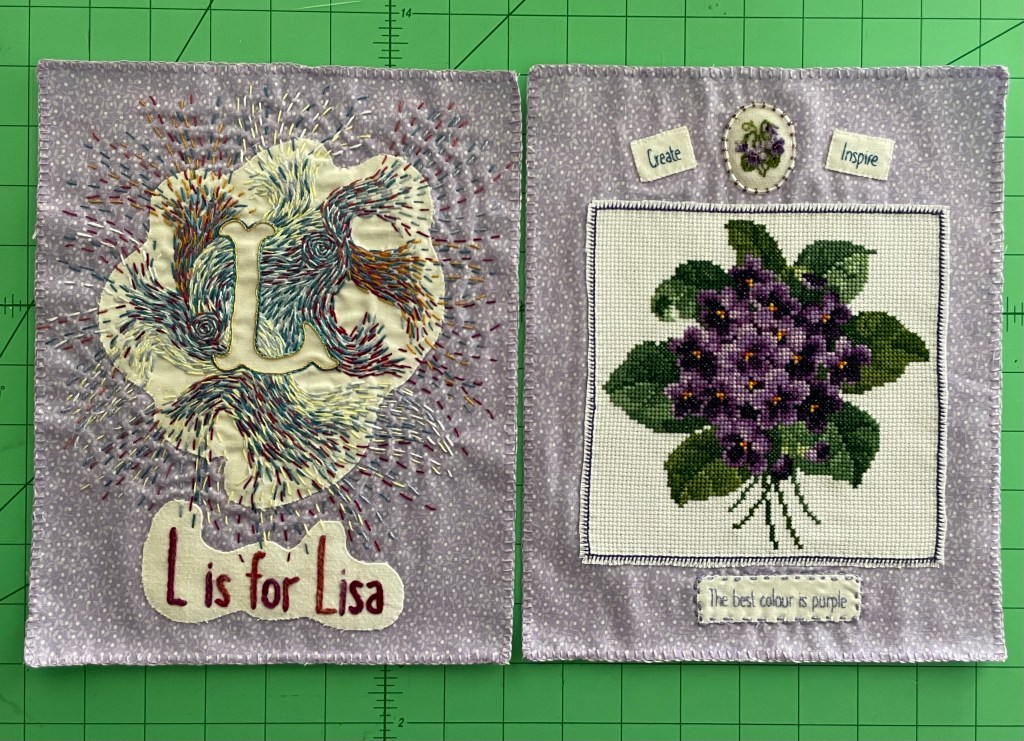
I was initially drawn to the design below, because the little girl is stitching LEFT-HANDED! and well, since I am left handed, I immediately felt connected to her. The design is by Lilipopo (another of my favourite Etsy designers)
A very large thought came to me recently – maybe I should find a title that is a little less specific. I have a sneaking suspicion that this will not be my last journal. I am pretty sure that I will continue with practice pieces, lovely Etsy finds, and those random fun projects that MUST be stitched!
And then it came to me … ” STITCH ALL OF THE THINGS ”
Such a simple phrase but it fits! It fits ME!
So I started thinking about my journal as if it is the first in a series of volumes. Not unlike an encyclopedia.
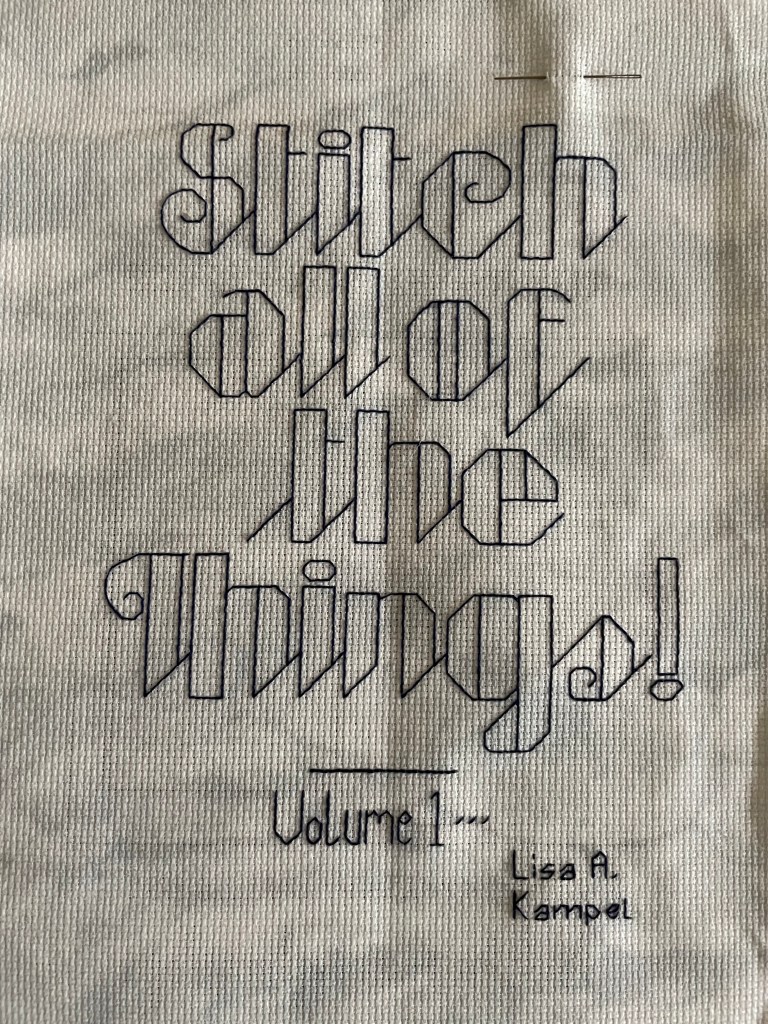
This journal will be “Volume 1”. A new front cover is in the works. I can repeat the title on future volumes, but with different stitching techniques. This new cover will be stitched in modern blackwork – alphabet design by Peppermint Purple
Original plans for my journal
Initially I had planned on the journal being more of a “storybook”, but I abandoned that idea as it had become too restrictive. In reality, this journal is more of a portfolio of my work – an exploration in embroidery styles, practice pieces and such. Eons ago I coined the phrase “getting it out of my system journal” and that’s what it still is. I wanted a way to finish and display the pieces that I have done over the years.

Back cover
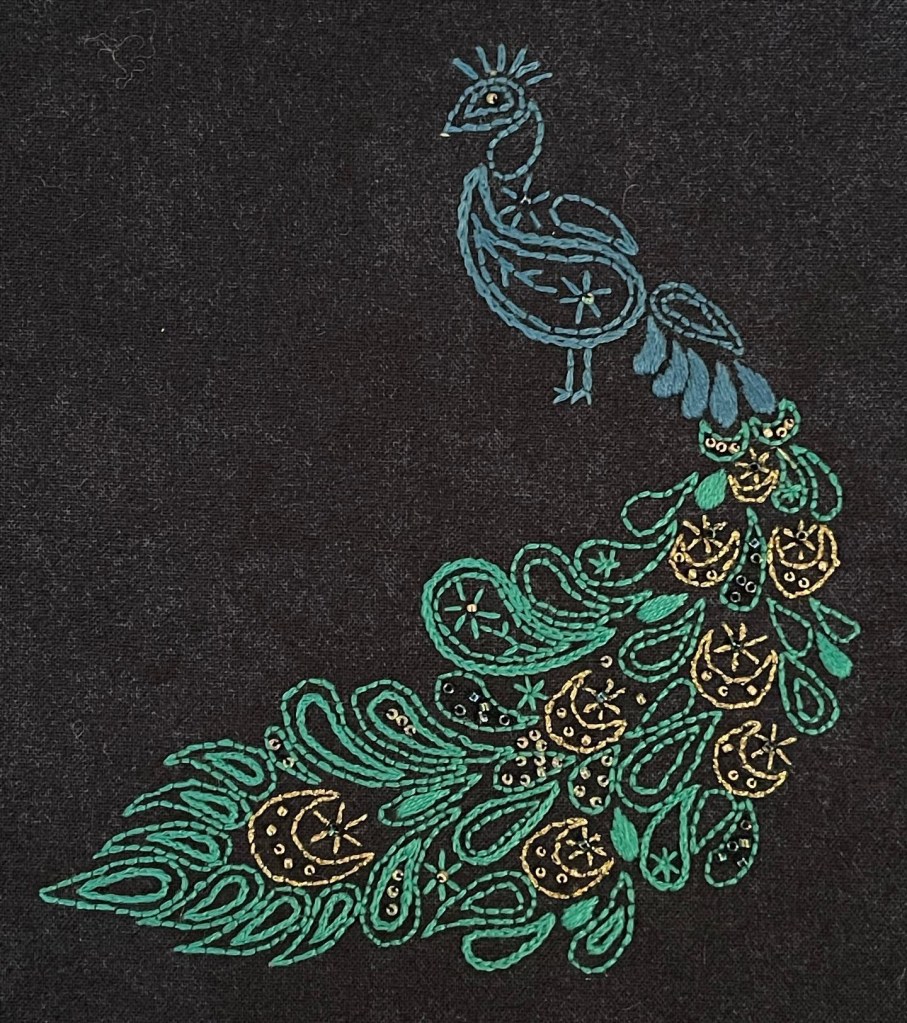
The paisly got me going on this design! Also the colours – teal, navy and gold. Paraffle is another Etsy find. This peacock has been on my list of stitching “to-do’s” for a very long time and it’s turned out beautifully. I’ve replaced the french knots with beads to make it more sparkly!
https://paraffle-embroidery.com
I’ve also been experimenting with different design transferring methods. For this piece, I’ve used a sheet of “Sticky Fabri-Solvy” which is a disolvable stabilizer. You print the design onto the stabilizer and then stick it onto your fabric and then embroider the design through the stabilizer. When you are done, you place the finished embroidery face down in cold water and the stabilizer dissolves. It’s quite interesting to use and here are my observations on stitching with the product.
- It’s easy to print the design onto the stabilizer with a printer. I bought 8 1/2 x 11″ sheets and they went easily through my printer.
- You can stitch a design with great accuracy.
- You can use this product to stitch on all sorts of materials – no matter the colour! Would work great on clothing (kind of like waste canvas).
- You need to make sure that you use materials that are colourfast. No overdyed threads!!!
- I have hot hands and found that the glue in the stabilizer became sticky. My needle got gooey as well and I had to wipe it often.
- The stabilizer came off very easily when it came to remove it. I had to soak it longer to remove remnants of the fibres from around the stitches.
- I don’t like the look of the stitches and how stiff they are after drying. This piece was stitched with 2 strands of DMC and I also do not like how the strands separated.
- I probably won’t use this product again for any fine embroidery, but it was fun to experiment with!
https://sulky.com/sticky-fabri-solvy/
Finishing Method
I am finishing this book using Amina from StitchFloral’s method. She uses button hole stitch to finish the page edges, and then whip stitches them together. She has published a tutorial on Teachable which you can purchase for a nominal fee. She has also branched out into YouTube and her videos are wonderful to watch.
https://stitchfloral.blogspot.com
Amina has provided me with much of the inspiration for my own journal and hopefully one day my layouts will be as nice as hers! All of my pages will be finished using the buttonhole stitch. I’ve not done a lot of buttonhole stitch over the years and it’s taken some time buidling consistency with my stitches. I admit, it’s much easier to do on evenweave, aida or linen than on quilter’s cotton or other tight weaved fabrics. It helps if I work on a flat surface (instead of in hand).

These two pages are ready to be joined in the center. As per Amina’s instructions, I’ll be using whip stitch to do that.
The african violet cross stitch and petit point are the only two pieces in my journal that I did NOT embroidery. Both pieces were given to me years ago and I wanted to feature them in my journal. Not so many years ago, I spent a lot of time growing and showing a variety of african violets. At one point at had nearly 300 plants! I have shifted away from growing african violets in favour of hand embroidery. In the spring and summer, I spend a lot of time in my flower garden and stitch in the winter instead.
My love affair with Etsy designers..
Many of the pieces in the journal are Etsy finds. There are so many talented designers and I really want to stitch designs from most of them. My “digital stash” is becoming quite a thing and I’ve got lots to choose from.
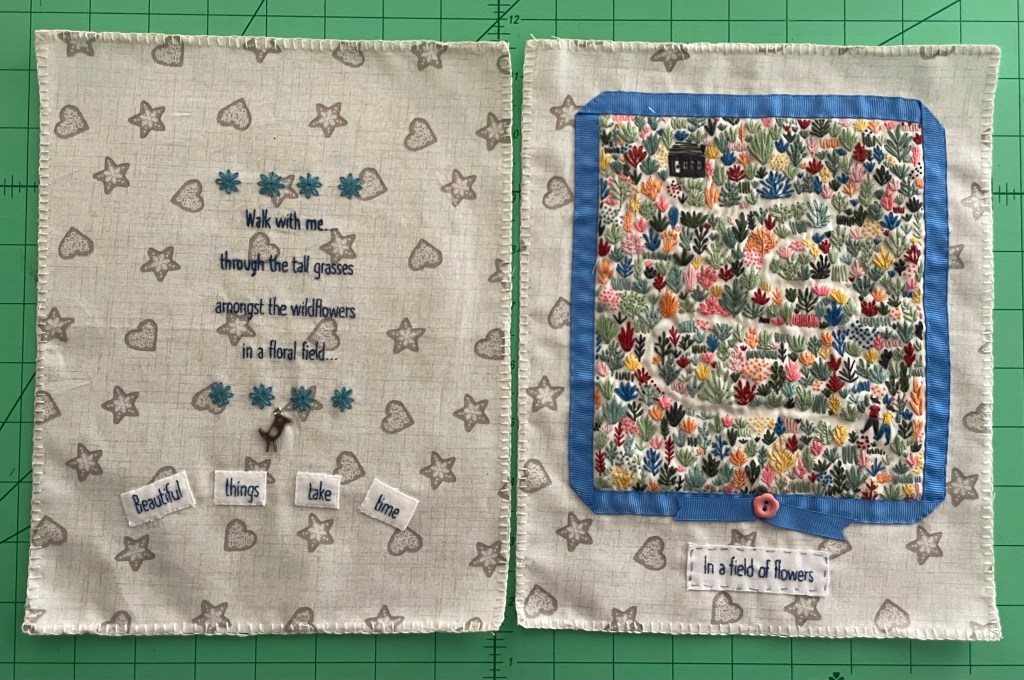
I stumble across new designers constantly and I love to support them by purchasing and stitching their patterns. When I saw this design – “Floral Field” I just new I had to stitch it! The original design is a round hoop design which I adapted into a rectangle.
I’m a fledgling at best when it comes to developing ideas and executing a good layout. Becoming good at things like this takes time and practice. As I continue through this journal I am hoping that my layouts get better!


Enjoying watching your book come together, beautiful stitching
LikeLike
Thanks! Epic in size, but a fun project
LikeLike