Every holiday season I spend some time making up ornaments for family and friends. I’m all over the place when it comes new designs, stitch techniques, themes and fnishing techniques. Santas… Harry Potter…. Calvin and Hobbes … Star Wars … Gundams …. you name it, I’ll try and stitch it!
I love to try out new designs, stitches and finishing techniques and find that Christmas ornaments are the perfect size to play around with! They are just large enough to get some experience with a new stitch or technique, but small enough to know by the end if you like the technique. Ornaments are a relatively small time commitment and thats a GOOD thing!


I made this series of three Calivn & Hobbes pillow ornaments for my son. I transferred the designs (which I found online) onto quilting fabric and, before stitching, I used wax crayons to lightly tint the fabric. Top stitching was done after with black DMC. They are finished with chenille trim by Lady Dot Creates and have simple black ribbon hangers.
If you are a quilter, you may be familiar with Crabapple Studios. They have a wonderful YouTube video tutorial on the tinting technique on their website.

I picked up this little painted canvas Santa from the charity table at one of our local guild meetings. No stitch instructions came with this lovely little fellow so I had some fun shopping my stash for threads and beads. I kept the stitches simple… tent stitch for the stars, face and mittens… turkey work for the trim on his hat and coat … and a basic repeating pattern to add texture to his jacket (over 2/over 4, repeat).
I couched a scrap piece of silver metal thread for his staff and finished the stars with some Kreinik silver threads, added a few beads to finish the stars on Santa’s jacket (every Santa needs a little Christmas sparkle).
Santa’s beard was a lot of fun. Did you know there is quite a large number of needlepoint stitches that have been designed specifically for Santa beards?? Just search “needlepoint stitches for Santa’s beard” and see what pops up. I can’t recall which stitch I picked – but it worked out great!! (Note: I stitched it with Rainbow Gallery Whisper)
I finished the Santa into a pillow ornament with some bugle beads from my stash and a simple, elegant red ribbon tied in a bow as the hanger.

I do love red cardinals and when I saw this design in one of my Prairie Schooler leaflets, I knew it would be perfect for an ornament! I don’t generally cross-stitch ornaments (it takes such a long time), but this design is quite small and only took a couple of nights to stitch. The aida is finished off with a double row Nun Stitch edging. I’ve added pom pom trim by Lady Dot Creates and have attached red ribbon tied in a dainty bow for the hanger.
Not familiar with the Nun Stitch?? It’s one of my most favourite edging stitches. It’s great on aida, evenweave and linen. It tidies up a raw edges quite nicely and keeps the fabric from fraying! Here’s a great little video tutorial on the stitch. Once you pick up the rhythm of the stitch, it goes quickly.
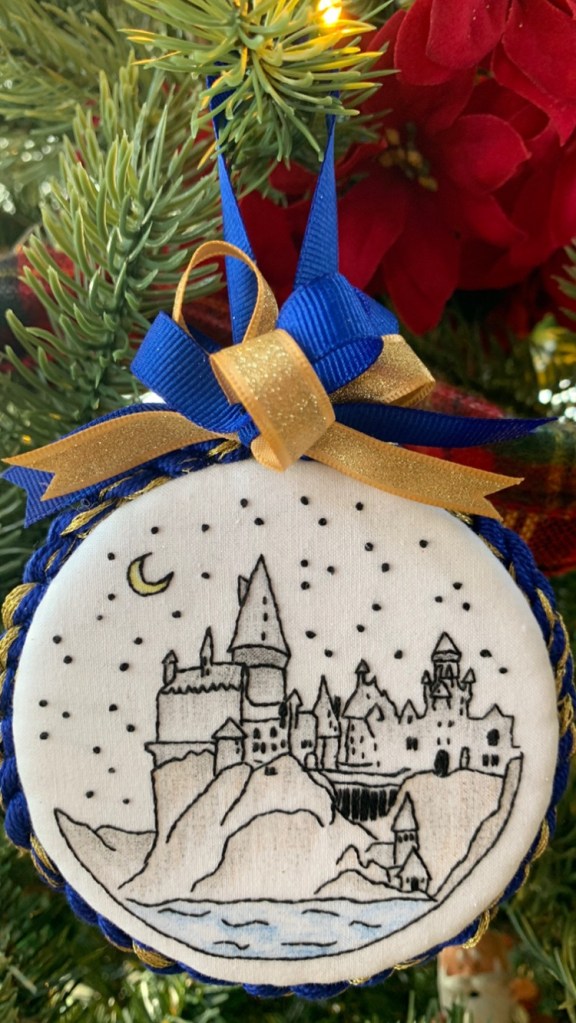
I used the same crayon tinting technique on this ornament for my daugher. She is a huge Harry Potter fan and this flat finished ornament, with it’s fancy blue and gold twist corded edge and fancy blue fancy bow, was made just for her. I used a round wood circle which I purchased at Michael’s and mounted the embroidery over the wood. If you would like to learn how to make your own round flat orament please check out the pro finisher Vonna Phiffer – The Twisted Stitcher – she has an amazing finishing tutorial library!
“Oh Christmas Tree” by Freda’s Fancy Stitches – One of my all time favourite ornaments! Totally stitched from stash and finished very simply into a pillow ornament. No trim on one, just a simple sparkly white ribbon hanger attached after the ornament was finished.
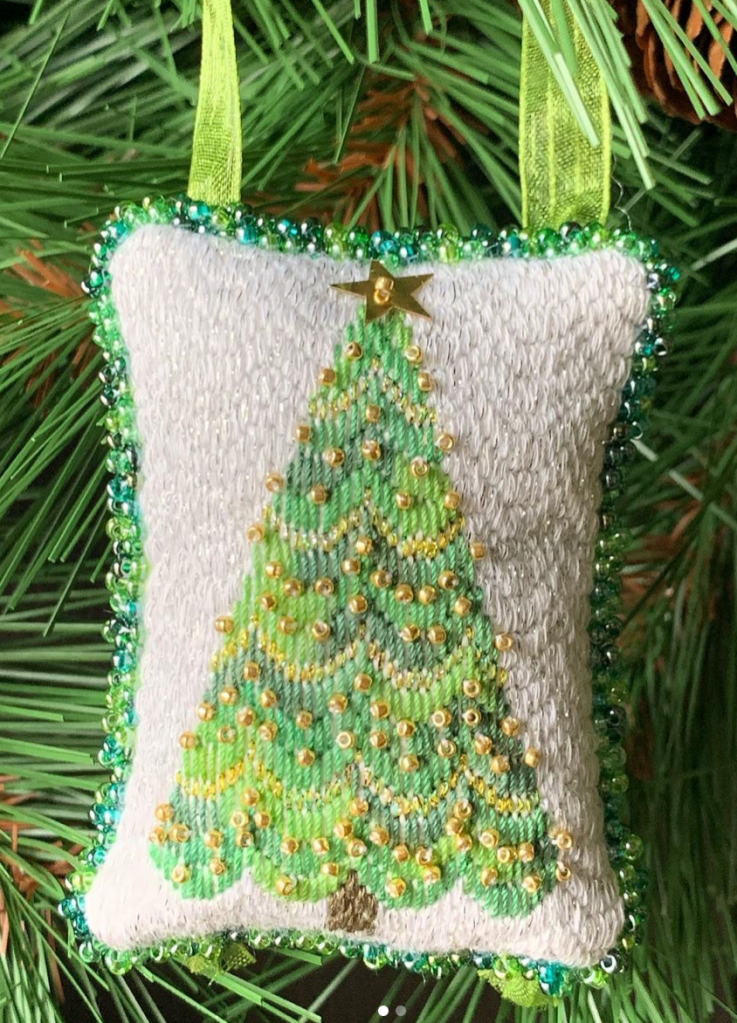
I rarely stitch a design twice, but I had to make an exception for this lovely tree design. My second ornamnet is a little different – the finished ornament is a bit smaller (the linen piece must have been a smaller thread count than last year) and I added a lovely beaded trim around the edge. I used DMC Etoille thread for the white background. I like the sparkle, but find it a bit difficult to work with due to the filament in the thread (just use shorter pieces). I used a sequin instead of stitching the star for the top of the tree.

Freda’s got a new tree – and here’s my version! I’m so happy that Freda made another tree design. I got some new metallic threads from Au Ver a Soir and they are just lovely to work with. A little chenille trim from Lady Dot Creates and a ribbon hanger and we are done. I embellished with some left over sequins from another project.

You can purchase your own digital copy of both of these patterns from Freda’s website. You’ll be glad you did!
https://www.fredasfancystitching.com/pages/christmas
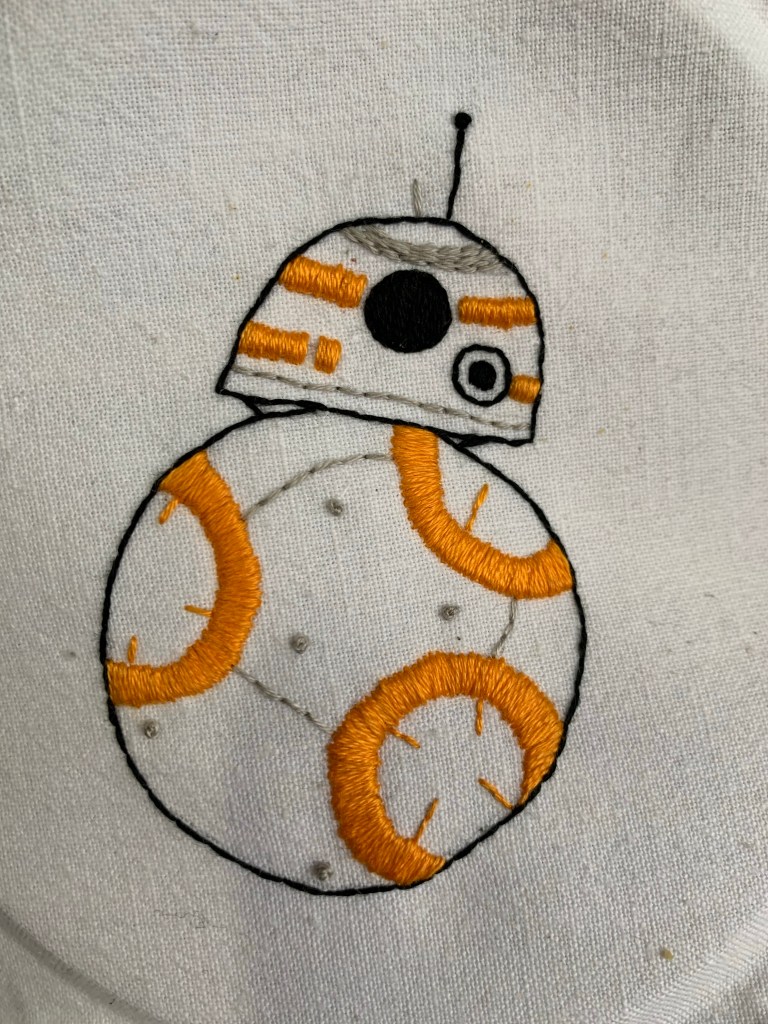
Every one should have at least one Star Wars ornament! I stitched this lovely little robot on some antique cotton fabric with DMC threads. He was a super quick stitch and was finished into a round flat ornament (similar to the Hogwart’s ornament above). Unfortunatly I forgot to take a picture of the finished ornament before I gave it away to my son for Christmas.
I found the pattern for the BB8 and other Star Wars characters from an online blog (all free) and adjusted to size. The instructions are easy to follow and she uses simple stitches (backstitch, satin stitch, french knots).
https://geeknots.wordpress.com/2016/08/17/16-free-star-wars-embroidery-patterns/
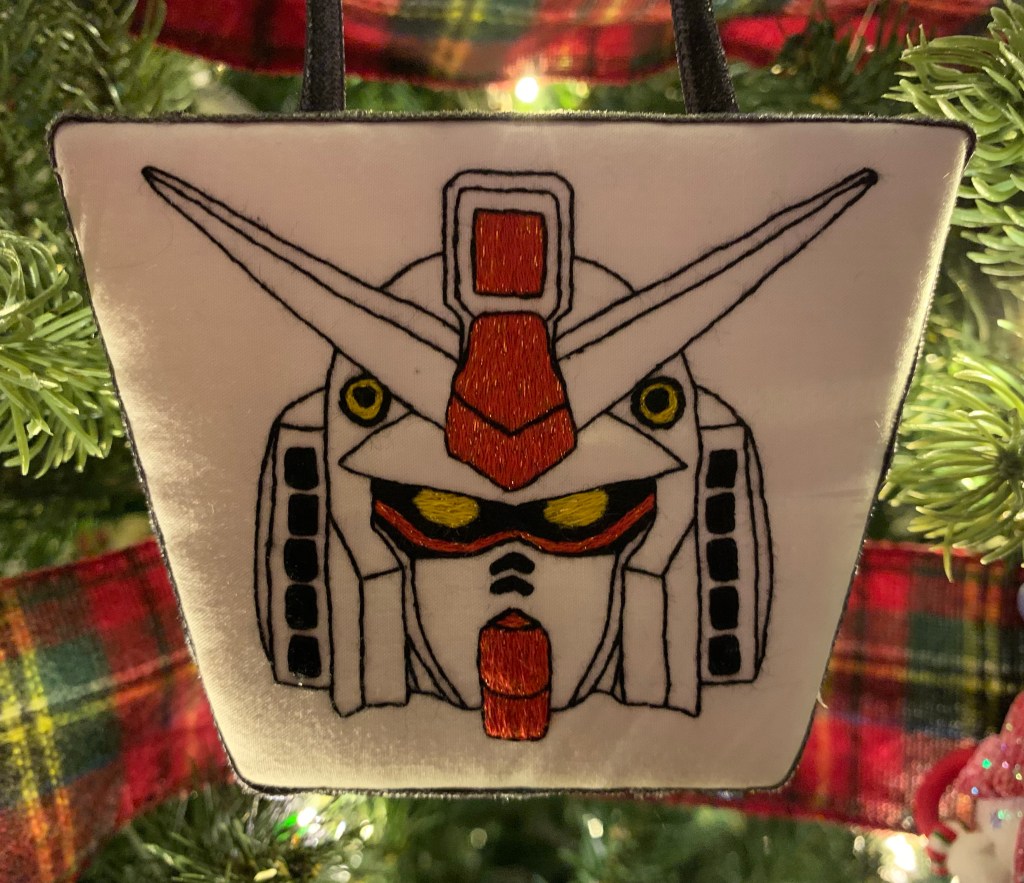
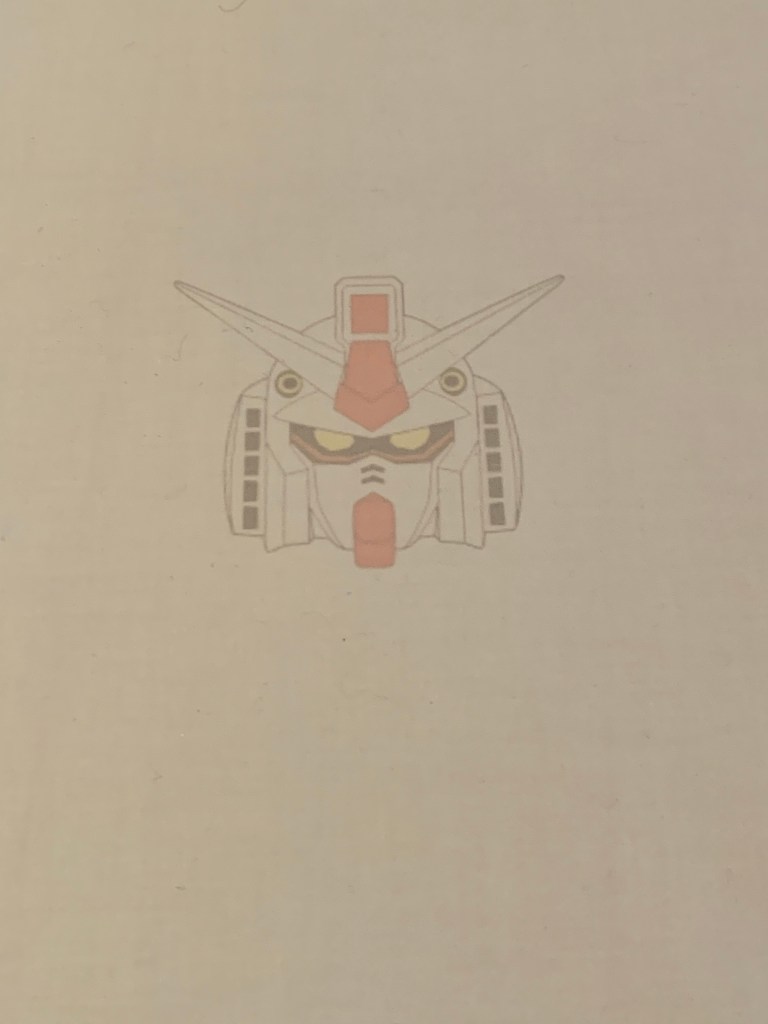
Even the most unsuspecting images make wonderful ornaments. My daughters fiancé loves to collect and build Gundam models. This fellow was stitched with a little DMC Etoille to for holiday sparkle, but the shape really makes this piece special!
The finished embroidery was mounted over a piece of foam-core (which I cut to size) using sequin pins to stretch and hold the fabric in place. The velvet ribbon (an unexpected find in my stash) was glued overtop of the pins and felt added to the back to cover the raw edges. I ran a simple whip stitch around both sides of the ribbon to provide extra stability.
In order to get a really precise image for this ornament, I transferred the design using freezer paper and my printer. Check out my tutorial on how to print onto fabric with an injet printer!